
JAVA AWT: Panel, Dialog and ToolKit


Java AWT Panel

The Panel is a simplest container class. It provides space in which an application can attach any other component. It inherits the Container class.

It doesn't have title bar.

AWT Panel class declaration

  1. public class Panel extends Container implements Accessible  

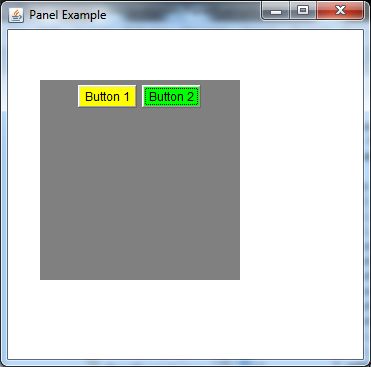
Java AWT Panel Example

  1. import java.awt.*;  
  2. public class PanelExample {  
  3.      PanelExample()  
  4.         {  
  5.         Frame f= new Frame("Panel Example");    
  6.         Panel panel=new Panel();  
  7.         panel.setBounds(40,80,200,200);    
  8.         panel.setBackground(Color.gray);  
  9.         Button b1=new Button("Button 1");     
  10.         b1.setBounds(50,100,80,30);    
  11.         b1.setBackground(Color.yellow);   
  12.         Button b2=new Button("Button 2");   
  13.         b2.setBounds(100,100,80,30);    
  14.         b2.setBackground(Color.green);   
  15.         panel.add(b1); panel.add(b2);  
  16.         f.add(panel);  
  17.         f.setSize(400,400);    
  18.         f.setLayout(null);    
  19.         f.setVisible(true);    
  20.         }  
  21.         public static void main(String args[])  
  22.         {  
  23.         new PanelExample();  
  24.         }  
  25. }  

Output:

java awt Panel example 1

Java AWT Dialog

The Dialog control represents a top level window with a border and a title used to take some form of input from the user. It inherits the Window class.

Unlike Frame, it doesn't have maximize and minimize buttons.

Frame vs Dialog

Frame and Dialog both inherits Window class. Frame has maximize and minimize buttons but Dialog doesn't have.

AWT Dialog class declaration

  1. public class Dialog extends Window  

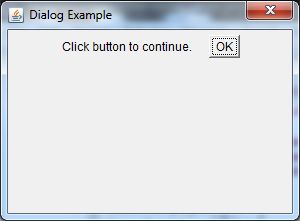
Java AWT Dialog Example

  1. import java.awt.*;  
  2. import java.awt.event.*;  
  3. public class DialogExample {  
  4.     private static Dialog d;  
  5.     DialogExample() {  
  6.         Frame f= new Frame();  
  7.         d = new Dialog(f , "Dialog Example"true);  
  8.         d.setLayout( new FlowLayout() );  
  9.         Button b = new Button ("OK");  
  10.         b.addActionListener ( new ActionListener()  
  11.         {  
  12.             public void actionPerformed( ActionEvent e )  
  13.             {  
  14.                 DialogExample.d.setVisible(false);  
  15.             }  
  16.         });  
  17.         d.add( new Label ("Click button to continue."));  
  18.         d.add(b);   
  19.         d.setSize(300,300);    
  20.         d.setVisible(true);  
  21.     }  
  22.     public static void main(String args[])  
  23.     {  
  24.         new DialogExample();  
  25.     }  
  26. }  

Output:

java awt Dialog example 1


Java AWT Toolkit

Toolkit class is the abstract superclass of every implementation in the Abstract Window Toolkit. Subclasses of Toolkit are used to bind various components. It inherits Object class.

AWT Toolkit class declaration

  1. public abstract class Toolkit extends Object  

Java AWT Toolkit Example

  1. import java.awt.*;  
  2. public class ToolkitExample {  
  3.   public static void main(String[] args) {  
  4.       Toolkit t = Toolkit.getDefaultToolkit();  
  5.       System.out.println("Screen resolution = " + t.getScreenResolution());  
  6.       Dimension d = t.getScreenSize();  
  7.       System.out.println("Screen width = " + d.width);  
  8.       System.out.println("Screen height = " + d.height);  
  9.   }  
  10. }  

Output:

Screen resolution = 96
Screen width = 1366
Screen height = 768

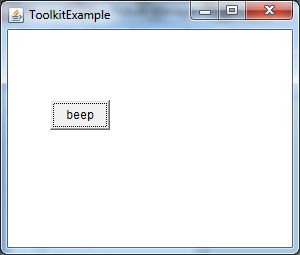
Java AWT Toolkit Example: beep()

  1. import java.awt.event.*;  
  2. public class ToolkitExample {  
  3. public static void main(String[] args) {  
  4.     Frame f=new Frame("ToolkitExample");  
  5.     Button b=new Button("beep");  
  6.     b.setBounds(50,100,60,30);  
  7.     f.add(b);     
  8.     f.setSize(300,300);  
  9.     f.setLayout(null);  
  10.     f.setVisible(true);  
  11.     b.addActionListener(new ActionListener(){  
  12.         public void actionPerformed(ActionEvent e){  
  13.             Toolkit.getDefaultToolkit().beep();  
  14.         }  
  15.     });       
  16. }  
  17. }  

Output:

java awt toolkit example 1

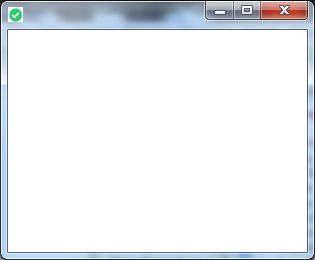
Java AWT Toolkit Example: Change TitleBar Icon

  1. import java.awt.*;   
  2. class ToolkitExample {   
  3. ToolkitExample(){   
  4. Frame f=new Frame();   
  5. Image icon = Toolkit.getDefaultToolkit().getImage("D:\\icon.png");  
  6. f.setIconImage(icon);  
  7. f.setLayout(null);   
  8. f.setSize(400,400);   
  9. f.setVisible(true);   
  10. }   
  11. public static void main(String args[]){   
  12. new ToolkitExample();   
  13. }   
  14. }  

Output:

java awt toolkit example 2

Anurag Rana Educator CSE/IT

Comments

Popular posts from this blog

Standard and Formatted Input / Output in C++

The C++ standard libraries provide an extensive set of input/output capabilities which we will see in subsequent chapters. This chapter will discuss very basic and most common I/O operations required for C++ programming. C++ I/O occurs in streams, which are sequences of bytes. If bytes flow from a device like a keyboard, a disk drive, or a network connection etc. to main memory, this is called   input operation   and if bytes flow from main memory to a device like a display screen, a printer, a disk drive, or a network connection, etc., this is called   output operation . Standard Input and Output in C++ is done through the use of  streams . Streams are generic places to send or receive data. In C++, I/O is done through classes and objects defined in the header file  <iostream> .  iostream  stands for standard input-output stream. This header file contains definitions to objects like  cin ,  cout , etc. /O Library Header Files There are...

Genetic Algorithm: Population, Fitness Function, Parent Selection, Cross over, Mutation

Genetic Algo Population Population is a subset of solutions in the current generation. It can also be defined as a set of chromosomes. There are several things to be kept in mind when dealing with GA population − The diversity of the population should be maintained otherwise it might lead to premature convergence. The population size should not be kept very large as it can cause a GA to slow down, while a smaller population might not be enough for a good mating pool. Therefore, an optimal population size needs to be decided by trial and error. The population is usually defined as a two dimensional array of –  size population, size x, chromosome size . Population Initialization There are two primary methods to initialize a population in a GA. They are − Random Initialization  − Populate the initial population with completely random solutions. Heuristic initialization  − Populate the initial population using a known heuristic for the problem. It has been observed that the e...

Normalization in DBMS: 1NF, 2NF, 3NF and BCNF in Database

Normalization   is a process of organizing the data in database to avoid data redundancy, insertion anomaly, update anomaly & deletion anomaly.  Anomalies in DBMS There are three types of anomalies that occur when the database is not normalized. These are – Insertion, update and deletion anomaly. Let’s take an example to understand this. Example : Suppose a manufacturing company stores the employee details in a table named employee that has four attributes: emp_id for storing employee’s id, emp_name for storing employee’s name, emp_address for storing employee’s address and emp_dept for storing the department details in which the employee works. At some point of time the table looks like this: emp_id emp_name emp_address emp_dept 101 Nikhil Kangra D001 101 Nikhil Kangra D002 123 Ashish Shimla D890 166 Rahul Pathankot D900 166 Rahul Pathankot D004 The above table is not normalized.  Update anomaly : In the above table we have two rows for employee Nikhil as he belongs ...